
租小型挖掘家。花一天时间学个证件。租机器送货到门。按照图纸挖。然后remix租个水泥车。提前说好多啊少。接管直接浇灌。
其实没有那么难
https://www.amazon.co.uk/dp/B0083LQXDG/ref=asc_df_B0083LQXDG51374238/?tag=googshopuk-21&creative=22146&creativeASIN=B0083LQXDG&linkCode=df0&hvadid=231908893094&hvpos=1o2&hvnetw=g&hvrand=3466946225625134892&hvpone=&hvptwo=&hvqmt=&hvdev=c&hvdvcmdl=&hvlocint=&hvlocphy=9045897&hvtargid=pla-422796922798
举个例子。专业工具。就是diy也可以变成专业的bricklayer
要那么平干嘛。土松松。租个压地机压平。
https://www.ebay.co.uk/itm/Compaction-Plate-Wacker-Compactor-Electric-Garden-Ground-Work-Patio-slabs-New-/282772026525
就这东西
https://www.tesco.com/direct/keter-apex-plastic-garden-shed-cream-8x6ft/200-3759.prd?skuId=200-3759
买个keter shed自己就能按。防潮效果特别好。旧衣服放了2年什么事都没有
这个很不错啊,收藏了, 谢谢 ![]()
如果非要木头的。那就是要shiplap。千万不要overlap的
这都有学问啊?
不过我很喜欢你的链接里的塑料的啊, ![]()
塑料的。铁的。木头的。个有个的特点。
塑料的贵,防潮。但是不防盗
铁的重。安装难。需要做防水。但是防盗。
木头的比较便宜,好安装。但需要保养。不防潮
我为啥总是看不了图片?
蜀黍,那shed下面也要concrete吗?还是说草地上也可以?
https://www.google.co.uk/imgres?imgurl=https://www.sheds.co.uk/blog/wp-content/uploads/2016/10/are-plastic-shed-bases-any-good_01-520x379.jpg&imgrefurl=https://www.sheds.co.uk/blog/are-plastic-shed-bases-any-good/&h=379&w=520&tbnid=5CX0bkCY9V6kjM:&tbnh=160&tbnw=219&usg=__MG4HVs13BjwYXE6hyndwjbAtEu0%3D&vet=10ahUKEwjX3Iy3qJ7aAhVKJcAKHd1wAcUQ9QEI0wIwAA..i&docid=lwDpiv5js1kysM&sa=X&ved=0ahUKEwjX3Iy3qJ7aAhVKJcAKHd1wAcUQ9QEI0wIwAA
用这个。自己浇石头子
https://www.sheds.co.uk/blog/are-plastic-shed-bases-any-good/
我在期待着全部弄好后的花园美照!
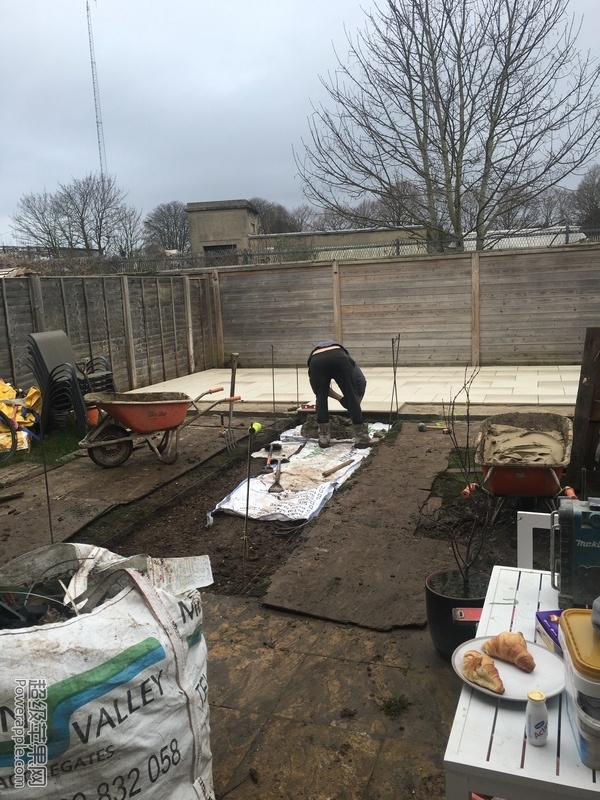
经过一个easter,这周builder们又回来了,昨天把其余的地砖都扑了,今天再弄pathway。

你就问问你地面要不要压。要不要用mot type one stone。就是很有礼貌的问问。说你就是好奇。这么说也不会惹builder不高兴
lily请告诉俺。是不是俺眼睛出问题拉。你的builder直接把装bulk bag给你埋地下啦。防草膜埋地下我理解,这个bulk bag。可能是我不专业,没听说过 ![]()
等你paving做完了。你往paving上浇水。只要浇完水,水坑留在paving上。让他们返工。角度没弄好
STEP 1: Site Preparation
Mark the pegs beforehand to indicate the depth and remember to allow for a gradual slope away from your property. Using the tape measure mark out the patio area. Check the corners, using a builders square. Removing topsoil is easily done using an edging iron and cutting the turf into manageable squares. Simply scoop with a spade and remove using a wheelbarrow and skip.
The excavated depth should be 150mm or 6 inches from the finished patio level. Measure the final depth of excavation using the pegs and strings.
Check the depth at the edge using a tape measure. Compact the soil with the Vibrating Plate Compactor and re-check the overall depths and slope of the area using the pegs and spirit level.
If you find soft spots in the soil, further excavation may be required. These spots can then be filled and consolidated with sub-base material.
Check all 90° corners and depths thoroughly before putting down the sub-base material.
When using excavation machinery please follow the manufacturer’s guidelines including acceptable levels of exposure and in particular use ear protection.
[b]STEP 2: The Sub-Base
Having tipped the sub-base material into the laying area, rake into position to a consistent depth of 100mm or 4 inches.
Once the area is covered, check the depth using a spirit level, pegs and string line.
Compact the area using a Vibrating Plate Compactor, making sure the entire area has been compressed at least twice. Check again for any sinking areas. If this occurs, an extra depth of sub-base material should be considered.
Once the sub-base is smooth, flat and to the appropriate level, check the drainage slope with a straight edge and spirit level.
When using the vibrating plate machinery please follow all manufacturer’s guidelines including acceptable levels of exposure and in particular use ear protection.
STEP 3: Preparing the Mix and Laying Paving Flags
When preparing the cement mix, please avoid direct handling of cement, always cover your skin.
[/b]Either using the cement mixer or wheelbarrow and shovel, prepare a mortar mix of 5 parts building sand, 1 part cement and add water to create a doughy consistency.
To check this is correct use the ‘snow ball’ test, pick up a handful of mortar mix and squeeze into a ball, when you let go the mix will retain its shape without oozing water or falling apart.
Starting in the corner, trowel a bed of mortar to cover the area intended for the first paving flag. The depth of the mortar bed should be approximately 35-40mm. Level off but ensure the mortar is not compact as you want the flag to sit within the mix about 10-15mm deep.
Remember when lifting and carrying paving units always consider the weight before attempting to lift. If it is heavy, get help. Take care not to trap fingers whilst handling paving units.
Lower the first paving flag into position, holding it diagonally will make it easier to lower it. Settle it cleanly into the mortar without sliding it about so a good bond forms between the mortar and paving flag.
Line up the paving flag with the string lines and gently tap it into the mortar using the rubber mallet.
Repeat the process, continuously checking against the string line. Also, use the spirit level to check the surface is at the correct level.
Check that no edges are standing up proud simply by running your hand over the joints. Ensure consistent gaps, ideally of 10-15mm between the slabs.
Leave the slabs for at least 24 hours so that the sand cement mix can set.
STEP 4: Cutting
Great care is needed and it is essential to use equipment specially designed for this operation. Diamond disc cutters with water suppression are ideal. They are readily available at your local equipment hire store.
Check you are wearing good personal protective equipment for this activity.
Mark the paving flag surface with the intended cutting line for guidance. Place the paving flag on a platform and carefully saw using a diamond disc cutter.
When using cutting equipment please follow all manufacturer’s guidelines including acceptable levels of exposure and in particular use eye protection.
STEP 5: Pointing
You can either buy ready mix compound or, using the shovel and trowel, prepare a jointing mix of 5 parts building sand, 1 part cement and water to a damp, semi-dry consistency.
Firm it into the joints using the trowel and finish with the pointing iron, compacting the mix into the gaps and producing neat grooves.
Carefully remove any excess pointing material using the trowel and yard broom, ensuring no residue is left on the slab surface.
好像没有弄这个 ![]()